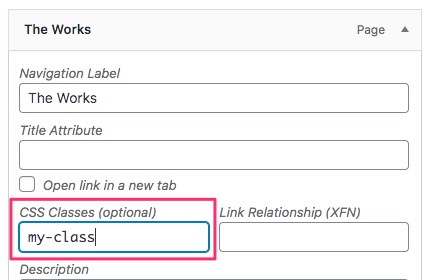
This is a question I get a lot related to UberMenu – WordPress Mega Menu Plugin, though it’s actually baked into WordPress Core. It’s a very powerful feature, as it allows you to target either a single menu item or a group of menu items with a single class. However, the option is hidden from the UI by default. In order to add a class to a menu item, you first have to reveal it.
1. In Appearance > Menus, click the Screen Options tab

2. Under Show advanced menu properties, check CSS Classes

3. Now expand any menu item to reveal the CSS Classes (optional) text input.

4. Enter your class name and save your menu to apply the class to the menu item
The class will be added to the LI (list item) element, the same element that has the menu item ID attached. You can then style your item like this, where .menu is replaced by the class used for your menu:
/* Target the menu item LI */
.menu li.my-class{
  /* Margin might go here */
}
/* Target the menu item Anchor (link) */
.menu li.my-class > a{
  /* Colors, font sizes, would normally go here */
}

/* Target the menu item LI in UberMenu */
.ubermenu .ubermenu-item.my-class{

}
/* Target the menu item Anchor (link) or span (link disabled) in UberMenu */
.ubermenu .ubermenu-item.my-class > .ubermenu-target{
  /* Colors, font sizes, would go here */
}
Remember that you may need to increase your selector specificity (or in rare cases use the !important flag) in order to ensure that your new styles are applied.
5. Enjoy even more customization control over your menu!
Note that this is a standard WordPress feature and works with or without UberMenu. If you need more control in UberMenu, UberMenu provides the ability to add Anchor Classes & IDs to your menu items
