
Installing updates just involves replacing the old plugin files with the new ones.
It’s always a good idea to do a full site backup before any update. Updates will overwrite all files in the /ubermenu plugin directory, but do not affect menu item or Control Panel settings.
Automatic Updates
(since v3.2.4)
To enable Automatic Updates, go to Appearance > UberMenu to access the UberMenu Control Panel, click the Updates tab, and then enter your Envato data.

Please note that this data will be sent to the update server for registration and validation – this includes your CodeCanyon username, purchase code, site URL, and UberMenu plugin version.
For a complete guide, please see Automatic Updates
Manual Updates
Downloading the latest version
To download the updated plugin zip, go to your CodeCanyon Downloads page and re-download the file. This will always give you the latest version of the plugin.

Now is a great time to rate the plugin 5 stars if you haven’t already. Giving 5 star ratings helps us keep pushing out feature and maintenance release updates. Thanks so much!

Updating via the WordPress Dashboard / WordPress plugin uploader
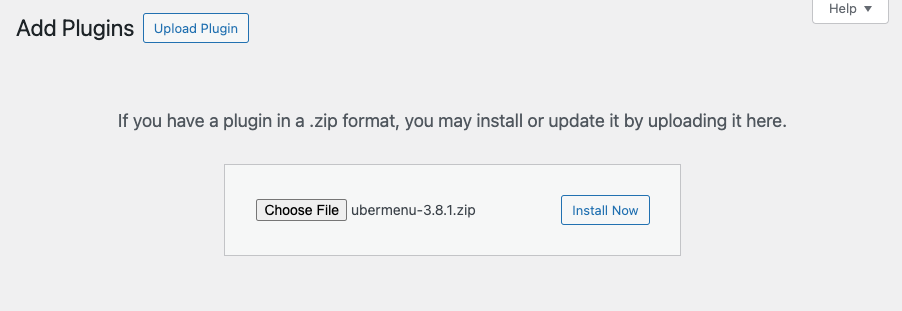
- In your WordPress Dashboard, go to Plugins > Add New Plugin
- Click Upload Plugin
- Select the zip file that you downloaded from CodeCanyon (if it’s not in zip format, it means your browser unzipped it automatically)
- Click Install Now
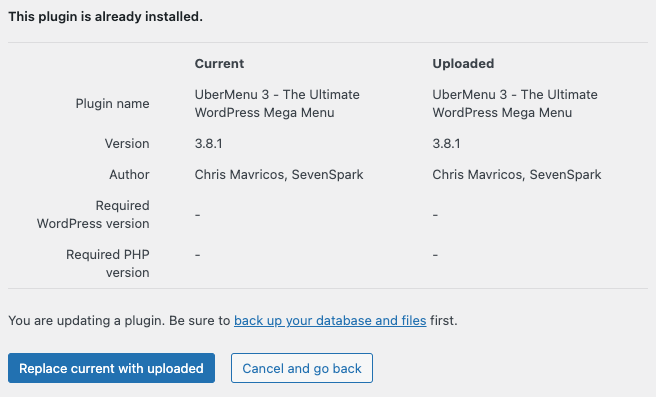
- WordPress will tell you that the plugin is already installed, and ask you if you want to replace it. Click Replace current with uploaded
- The plugin should now be updated to the latest version
Please note that this requires a modern version of WordPress – older versions of WordPress did not support this method of updating.
Updating via FTP
- Download the new version of the plugin from CodeCanyon (the latest version can always be found on your CodeCanyon Downloads page)
- In your browser, log into the WordPress control panel.
- Navigate to Plugins
- Deactivate UberMenu (optional, but generally a good idea, especially if you are deleting the old version in step 6)
- Switch to your FTP program, FTP into your site and navigate to the
wp-content/pluginsdirectory. - After backing up any files you’ve created in your
ubermenu/customdirectory, delete UberMenu (the entireubermenufolder). Strictly speaking, this is optional, but makes the upload process more straightforward. You can also overwrite the old files if you prefer. (Please check for version-specific upgrade instructions; sometimes a deletion is strongly recommended) - On your desktop, extract the zip file you downloaded from CodeCanyon
- The archive unzips to a new
ubermenu/directory - FTP the new
ubermenu/folder into thewp-content/pluginsdirectory on your server. - If you saved an edited copy of your
custom.cssfile as a custom preset (orcustom.js), upload it toubermenu/custom/directory. - Ensure that your permissions are set properly on the
plugins/ubermenudirectory. If your server can’t read the files, you might run into errors. This can happen depending on how your FTP account is set up. - Switch back to your browser and go back to the Plugins panel
- Reactivate UberMenu by clicking Activate
Note: If you are running a local server, just copy the files rather than FTPing
Upgrading Major Versions
Migration from UberMenu 2 to UberMenu 3
Version 3 is a MAJOR upgrade. Please be sure to test this on a test server before deploying to your live site, and always take a backup before making any changes to a live site.
If you are upgrading from UberMenu 2 to UberMenu 3, please follow the UberMenu Migration Instructions after installing the new version via the instructions above, in order to migrate your settings. Please read through the migration instructions before beginning the upgrade process.
If you are using any UberMenu Extensions, you will also need to update them to their 3.0 versions for compatibility with UberMenu 3